How to Film Your First Yoga Class (Beginner-Friendly Guide)
If you run a yoga studio or teach online, filming your first yoga class can feel high-stakes. You want your flows to feel calm, your cues to land, and your space to look as peaceful on screen as it does in real life.
The good news: you don’t need a full film crew to get a solid first result. You do need a bit of planning, some basic gear, and a setup that makes your instructor feel relaxed rather than “performing”.
This guide walks you through how to film your first yoga class step by step, without getting lost in camera-nerd jargon.

A calm, minimal setup helps your instructor feel relaxed and look great on camera.
1. Decide what the video is actually for
Before you touch a camera, get clear on the purpose of this first class. It changes how you film it.
Ask yourself:
Is this for YouTube or social content to attract new students?
Is this for an on-demand membership or app library?
Is this a one-off trial or the start of a full library?
If it’s for an app or membership, you’ll care more about:
consistency with future videos
clean sound and stable framing
pacing that feels good to repeat, not just “watch once”
If it’s mainly for YouTube or Instagram, you might prioritise:
punchier pacing
tighter framing
visuals that stand out in a feed
Knowing this early stops you “sort-of” filming something that doesn’t quite work anywhere.
Before filming, check how light, shadows and acoustics behave in your space.
2. Choose the right room (light, space and acoustics)
Your first instinct is usually “let’s just use the studio”, but not every room that feels good in-person works on camera.
When picking your space, think about three things:
Light
Aim for soft, even light, not harsh spotlights or tiny windows blasting one side of the mat.
Natural light can work if it’s indirect (big windows with sheer curtains, no direct sun across the mat).
Avoid mixed lighting (cool LED plus warm tungsten). That’s how you end up with orange faces and blue walls.
If you only have overhead downlights, consider:
turning some off
adding a couple of soft lamps at a distance
or in a perfect world, hiring a simple softbox kit for the day
Space
You need enough space to:
see the full body in standing, seated and supine poses
move a tripod slightly left or right without crashing into walls
leave some breathing room around the mat rather than wall-to-wall framing
If the room feels tight in person, it will feel even tighter on camera.
Acoustics
This is the one most studios ignore.
Even if you’re planning to add voiceover later, bad acoustics will hurt you when you eventually want to record live cues.
What to avoid:
long echo and reverb (bare walls, hard floors, big empty rooms)
noisy air con or fridges humming in the background
thin walls where you hear street noise or weights dropping next door
If you clap once in the middle of the room and hear a sharp “ping” bouncing back, it’s too live. Rugs, soft props, curtains and wall hangings all help.
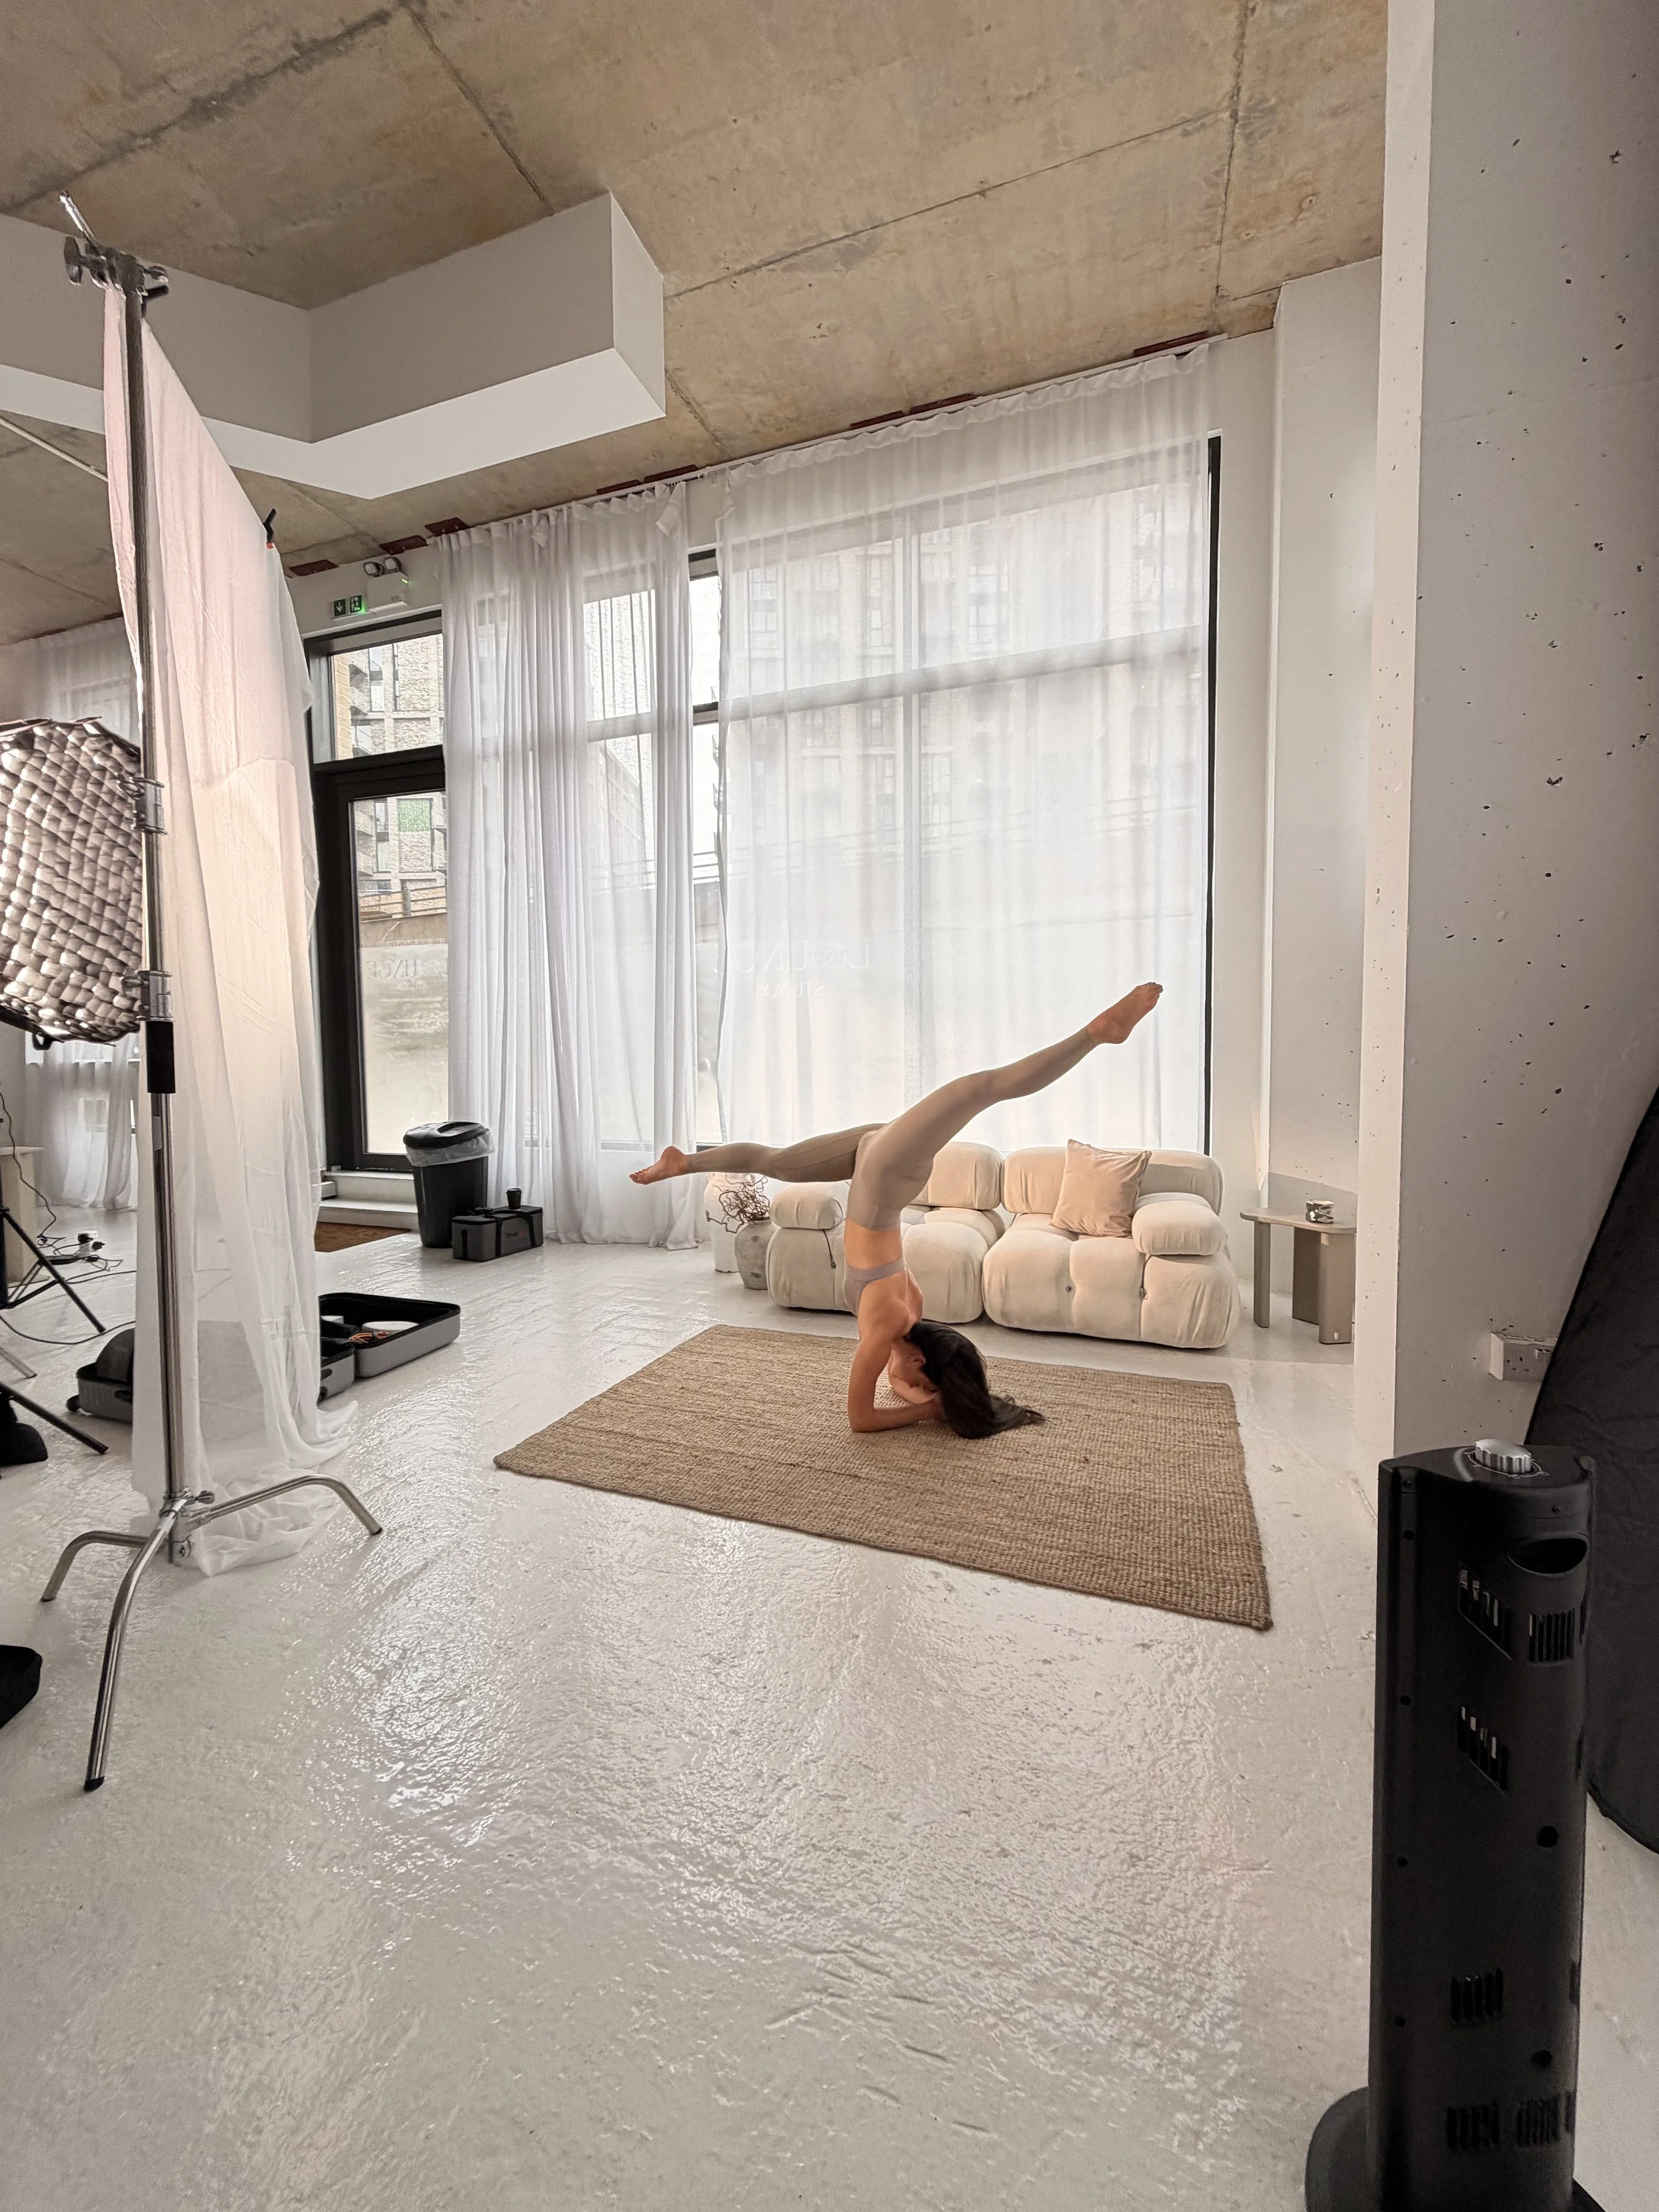
Shot at Lounge Studios, London, E16 — a bright space that keeps instructors calm and comfortable on camera.
3. Build a calm environment for the instructor
Most yoga teachers are comfortable teaching in front of people, not cameras.
If they feel stiff, apologetic or rushed, it will show.
Your job is to make the environment feel as close to a normal class as possible.
Keep the crew tiny, ideally 1–2 people tops.
Clear unnecessary clutter so they aren’t worrying about tripping over gear.
Let them run the class almost as normal, and treat mistakes as something you can cut around later.
Tell them upfront:
“If you stumble a word or miss a cue, keep going. We’ve got a second angle and editing to smooth it out.”
That alone drops their anxiety and makes your first filmed class feel more like a practice than a performance.
If you’re using two cameras, this is where they shine. One wide, one closer, and you can cut over small mistakes. You can link out internally here to your “How to Film Workout Classes With Two Cameras (Beginner Friendly Guide)” for people ready to level up.
4. Gear you actually need (and what you don’t)
You don’t need cinema cameras to film your first yoga class. You do need reliable, predictable gear.
At minimum:
One main camera that can shoot in 1080p or 4K, with a lens wide enough to see the entire mat in standing poses.
A sturdy tripod, so your framing isn’t drifting.
Power from mains if possible, so you’re not juggling battery swaps mid-flow.
Enough storage to record 60–90 minutes without panic.
If you add a second camera, use it for:
a consistent side angle
or closer framing on the torso for alignment cues
Don’t overcomplicate it. Two solid angles that match in brightness and colour will always beat four mediocre ones.
If you’re mixing cameras, try to:
shoot both in the same colour profile/gamma where possible
match white balance and exposure at the start
Keep shutter speed consistent to avoid weird motion differences
Pro Tip: For a more in-depth look at using two cameras to record Yoga / Pilates / Weightlifting classes. Click Below.
5. Framing and angles that work for yoga
Your first goal: never cut off hands, feet, or the top of the head in standing poses.
Start with a simple framing rule:
In mountain pose at the front of the mat, the teacher fits fully in frame with a little room above their head and below their feet.
In seated and supine poses, you still see the full body without cropping ankles or knees.
Classic first angle:
Camera roughly waist height or slightly higher.
Centre the mat horizontally in frame.
Leave some “lead room” in front of where the teacher faces, rather than dead-centred side-on.
If you have a second camera:
Set it at a 45-degree angle to the mat, slightly closer.
Use it for detail and variety in longer holds.
This combination is safe, flattering, and easy to cut.
6. Sound, even if you’re not recording live cues
Some clients might not need audio at all. But for most studios, clear sound is the difference between “we’ll actually use this” and “this looks nice but nobody can follow it”.
Even if you:
plan to record voiceover later, or
use pre-recorded audio tracks,
you should still:
turn off obviously noisy fans and air con where safe
keep doors closed
ask people not to stomp around outside the room
If you are recording live teaching:
use a wireless lapel mic on the instructor or a good shotgun mic placed close.
avoid relying on the camera’s built-in mic unless you’re forced to.
The acoustic quality of the room from earlier feeds directly into how usable that audio is.

Plan your filming day to avoid burnout and keep classes consistent.
7. Plan a realistic number of classes per day
Studios often wildly underestimate how tiring filming can be, both for teachers and whoever is behind the camera.
For your first filming day, aim for:
3–5 full classes (15–30 minutes each) as a comfortable target.
Once you’ve done a few shoots and have a rhythm, you can push toward 8–10 shorter classes in a day if everyone is prepared and the flows are well planned.
Remember:
Teachers need breaks, water and a chance to reset.
You need time to check footage, adjust framing and fix tiny issues before repeating the same mistake across 10 videos.
Being conservative on day one usually leads to better, more usable content and fewer re-shoots.
8. Look after basic comfort: water, mats and pacing
It sounds small, but it matters.
Make sure there’s water on hand and scheduled breaks.
Have a spare mat and basic props in case something looks worn or clashing on camera.
Let the instructor run through the flow once in their head while looking at the camera setup, so they aren’t surprised by angles when they start.
A tired, dehydrated teacher can still “perform”, but you will see it in their energy and hear it in their breath.
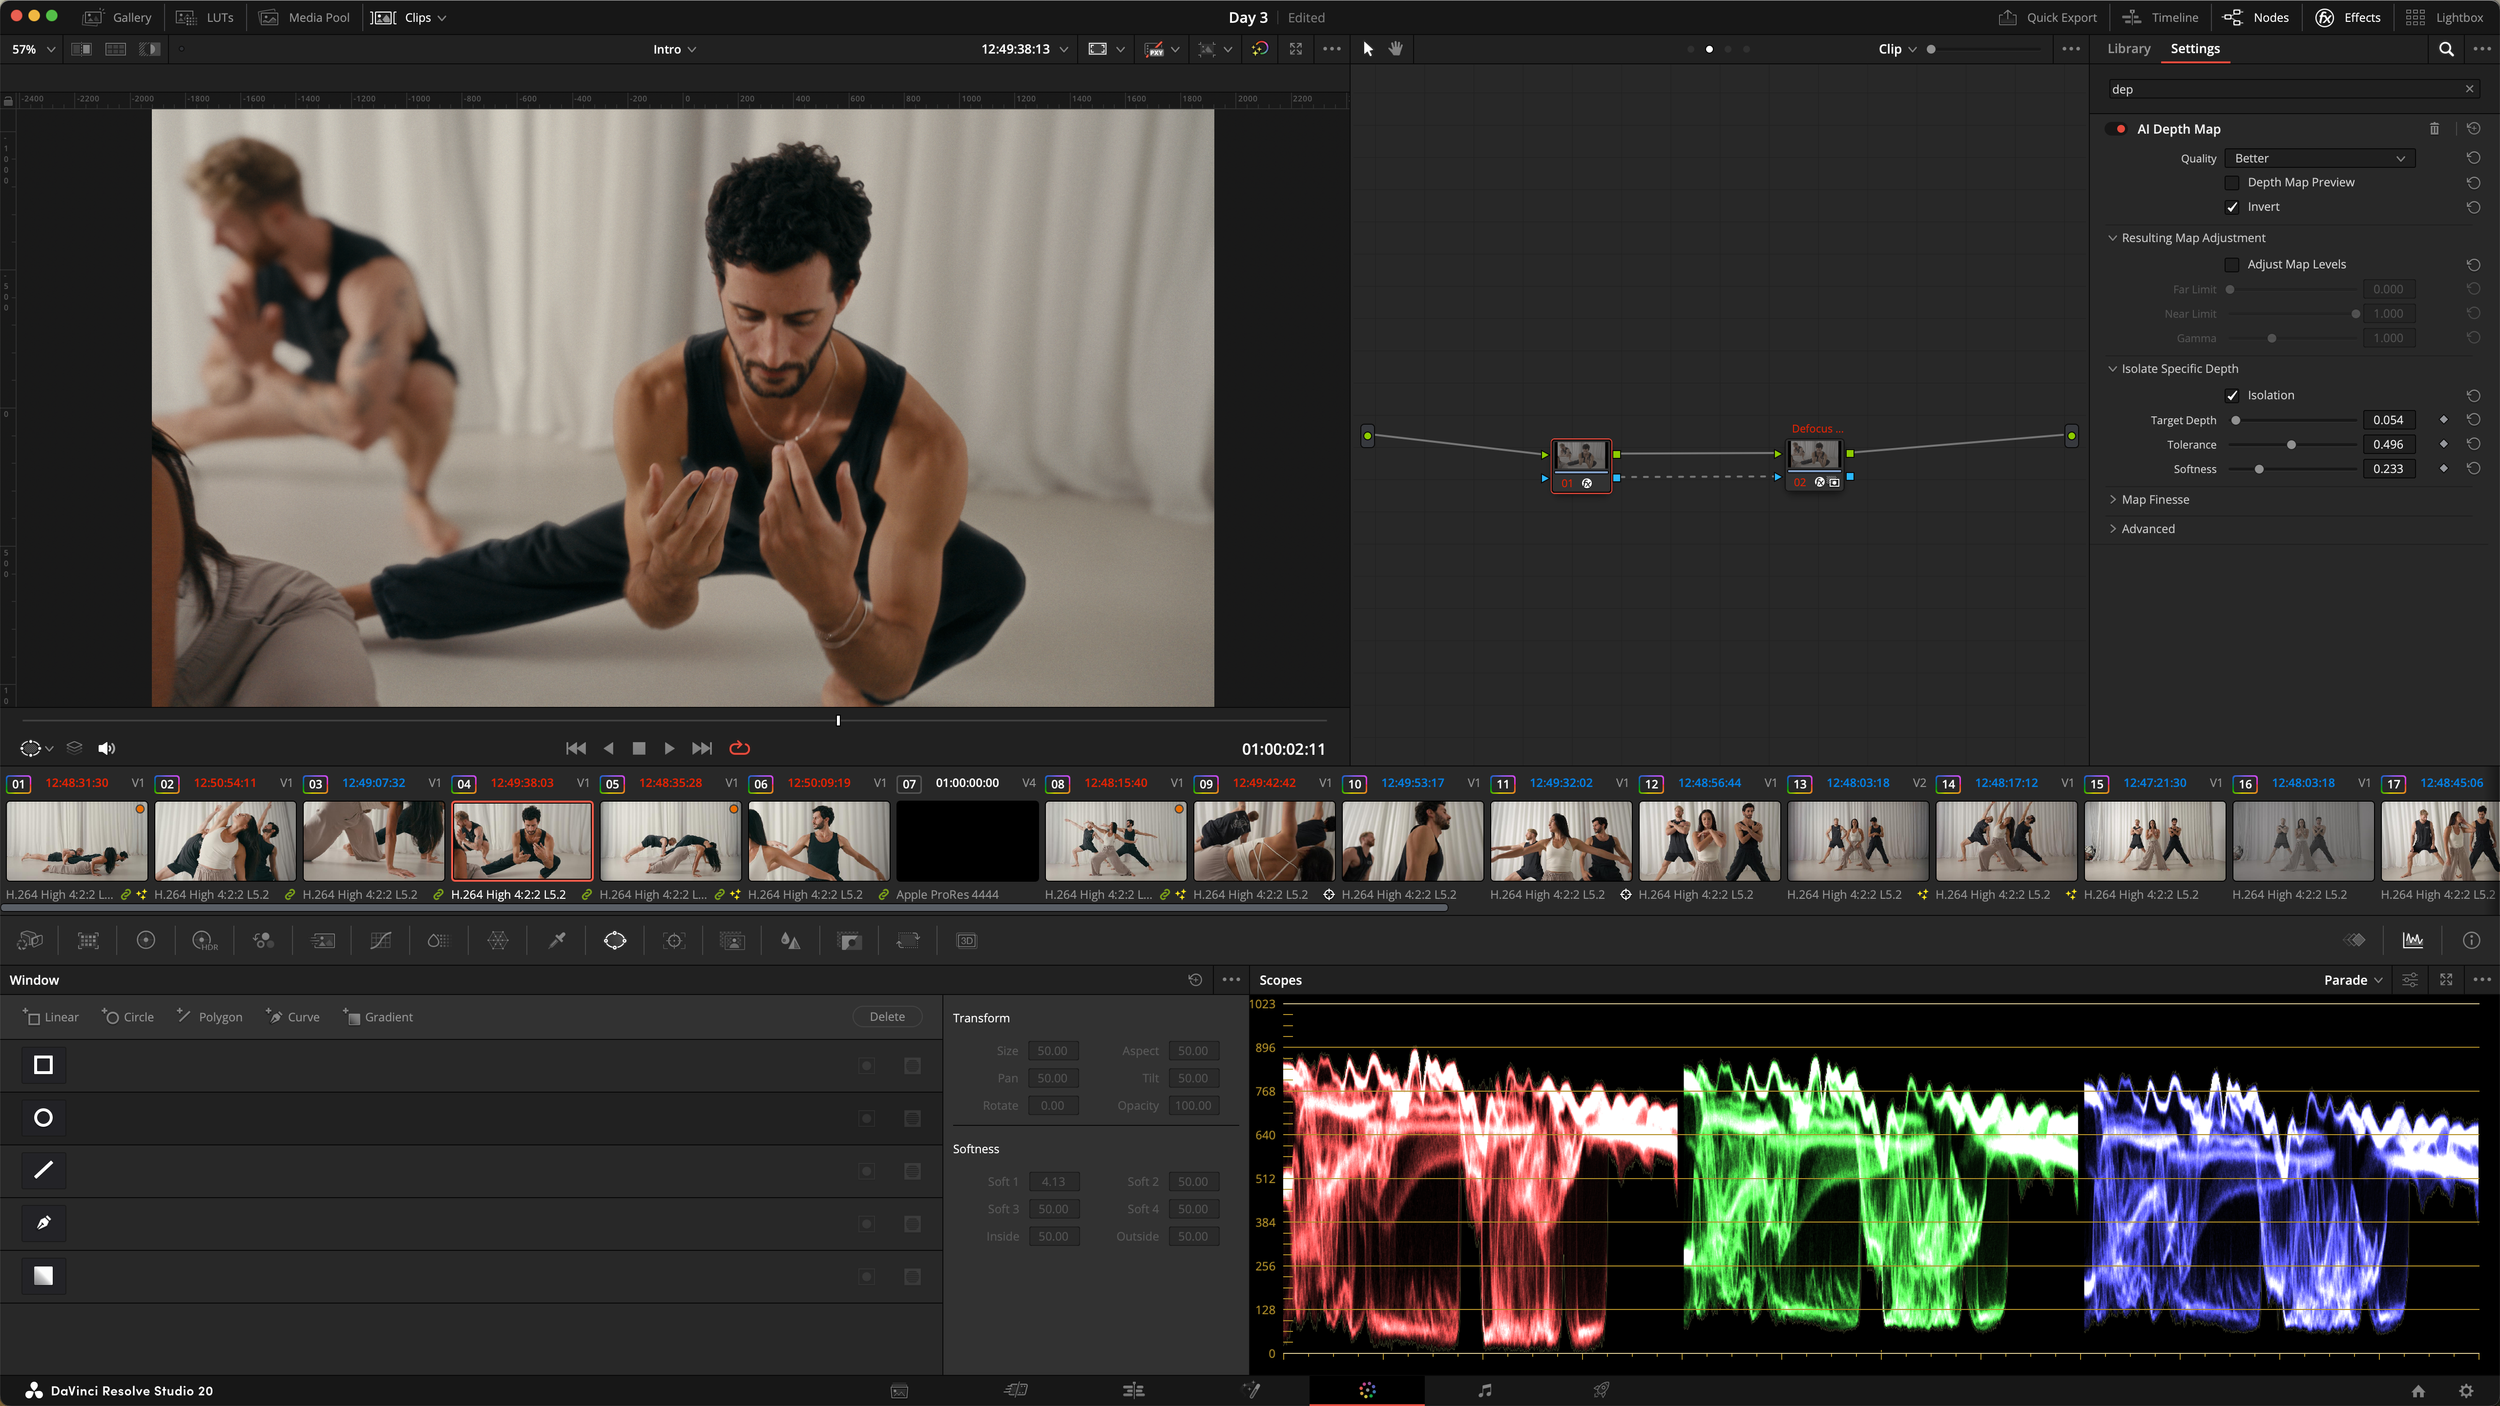
Good editing brings everything together: sync angles, match colour and create a calm, cohesive class.
9. Editing: sync, colour and consistency
Once you’ve filmed, the real work is making everything feel like one calm, coherent class, not a collection of clips.
At a minimum, in your editing software:
Sync your angles
Use a clap at the start of the recording so you can easily align the waveforms.
Many editors (Final Cut, Premiere, Resolve) have multi-cam or sync features. Use them.
Match the colour across angles
Make sure both cameras have similar exposure and white balance.
Apply the same basic correction to each angle so they don’t shift every time you cut.
Trim out obvious mistakes
If the teacher restarts a cue, adjusts clothing, or trips a word they immediately repeat, cut it.
Use your second angle to hide these edits where possible.
Export in the right format and aspect ratio
For most platforms, 1080p is enough.
You mentioned a 1:1 square crop – frame with that in mind when you shoot, so you aren’t cutting off limbs later.
10. When it makes sense to hire a professional
There’s a point where doing it all yourself starts to cost more in time, stress and re-shoots than hiring someone who does this every week.
If you’re:
building a full-on-demand library
planning to monetise through subscriptions, apps or premium memberships
or want that soft, premium look that matches a high-end studio fit-out
…it’s worth running the numbers.
A good production partner will:
bring lighting, cameras and sound that just work
guide the instructor on pacing and presence
keep framing and colour consistent across dozens of classes
deliver files ready for your app or platform in the correct specs
You can even add a small section here pointing to your “Workout Video Production Costs in 2025: UK Pricing Guide for Gyms & Studios” so they can see ballparks without feeling like they’re getting pitched.
Even if they do not hire you immediately, you’ve positioned yourself as the obvious specialist.
Pro Tip: To make the most out of hiring a pro, read the blog below.
Checklist: your first filmed yoga class, simplified
If you remember nothing else, use this as a quick run-through on shoot day:
Clear, realistic purpose for the video
Room picked for light, space and acoustics
Calm, simple environment for the instructor
Reliable camera (or two), powered by mains if possible
Framing checked in standing, seated and supine poses
Room noise minimised, basic audio considered even if not used now
Realistic target: 3–5 classes for your first day
Breaks, water and props ready
Clap sync at the start, tidy edit at the end
Exported in the right format and 1:1 crop if needed
Do that, and your “first” filmed yoga class won’t feel like a test. It’ll feel like the first step toward a proper on-demand library you can confidently charge for. And if you get halfway through planning and decide you’d rather hand it off, that’s exactly what Fitness Class Filming exists for.
Plan Your Shoot.
Tell me a bit about your space and classes and I’ll send back a rough shoot plan and ballpark budget.
I’ve filmed for gyms, yoga studios and fitness brands across the UK. If you’re not sure where to start, I can help you plan a realistic shoot that fits your space and budget.